Home Blog Page 30

Tanzanian Ugali Recipe: Making the Classic Maize Flour Dish

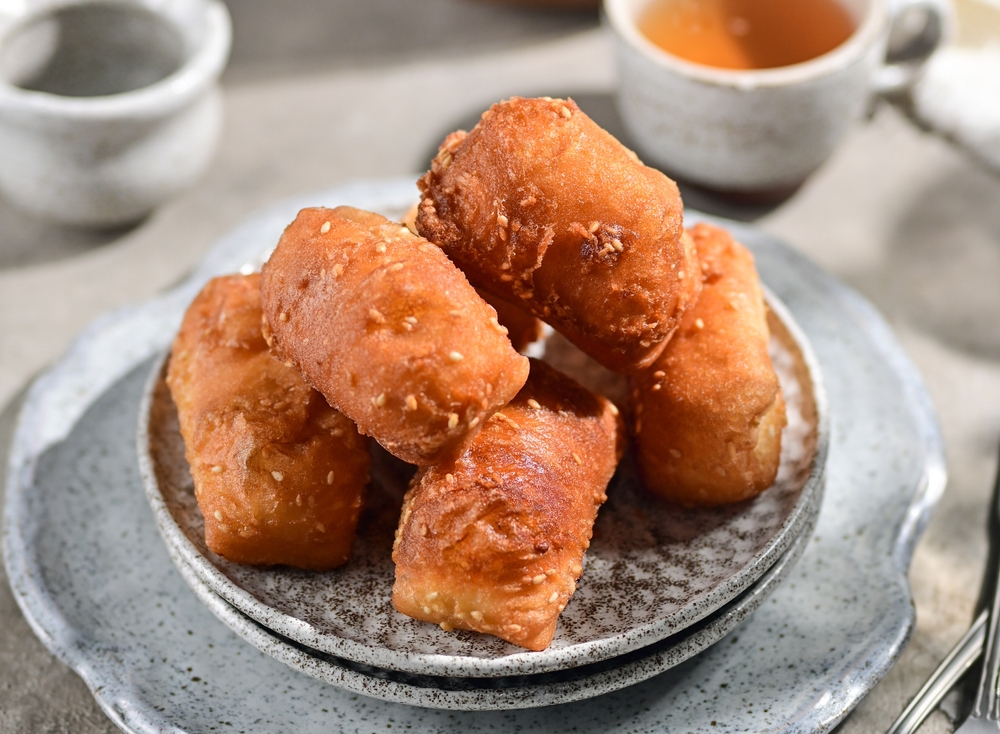
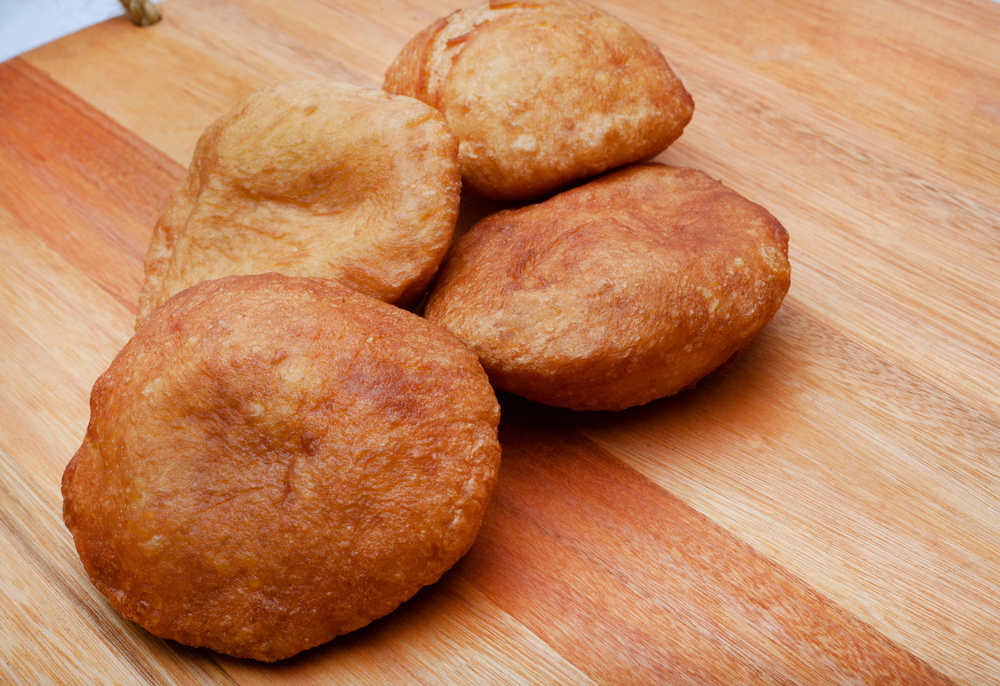
Ugali, a staple dish across many parts of Africa, holds a special place in the culinary landscape of Tanzania. A dense, dough-like side dish made from maize (corn) flour, it serves as the perfect accompaniment to an array of main dishes. In Tanzania, Ugali is not just food—it’s a symbol of sustenance, unity, and tradition.

Tracing the Origins of Ugali in Tanzania

While the dish is found in various forms across the African continent, in Tanzania, Ugali is deeply intertwined with the country’s agricultural practices and cultural ceremonies. Maize, introduced to Africa centuries ago, became a staple due to its adaptability to the region’s varied climates. As it grew in prominence, so did the techniques to process and consume it. Ugali emerged as a simple yet satisfying solution to provide energy and nourishment.

In Tanzanian households, the act of preparing and eating Ugali is almost ritualistic. It’s commonly consumed with sukuma wiki (collard greens) or fish from Lake Victoria, especially in the northern regions.

Essential Ingredients for Tanzanian Ugali

  1. 2 cups of maize (corn) flour, preferably white
  2. 4 cups of water
  3. A pinch of salt (optional)

Note: The ratio of water to maize flour might vary slightly based on personal preferences for the final consistency.

Step-by-Step Cooking Instructions

  1. Preparation: Begin by bringing the water to a boil in a sizeable sturdy saucepan or pot. If you’re using salt, you can add it to the boiling water.
  2. Pouring the Flour: Reduce the heat to medium. Slowly start adding the maize flour to the boiling water while stirring continuously to prevent any lumps from forming.
  3. Mixing: Continue stirring and adding flour until the mixture thickens and starts to pull away from the sides of the pot.
  4. Cooking: Once the Ugali has thickened to a dense, dough-like consistency, reduce the heat to low. Cover the pot and let it cook for a few more minutes.
  5. Serving: Remove the pot from the heat. Wet a wooden spoon or spatula and use it to shape the Ugali into a smooth mound. Turn it out onto a serving plate. It’s traditionally served hot and is eaten with the hands. You pinch off a small piece, roll it into a ball, and use it to scoop up accompanying dishes.

Embracing the Full Ugali Experience from Tanzania

To truly appreciate Ugali, one must understand its role in Tanzanian dining. It’s often enjoyed in a communal setting, emphasizing the unity it brings to the table. Whether paired with rich stews, grilled meats, or simple vegetables, Ugali’s versatility shines through. For many Tanzanians, a meal feels incomplete without this cherished staple.

Discover the World of Tanzanian Cuisine

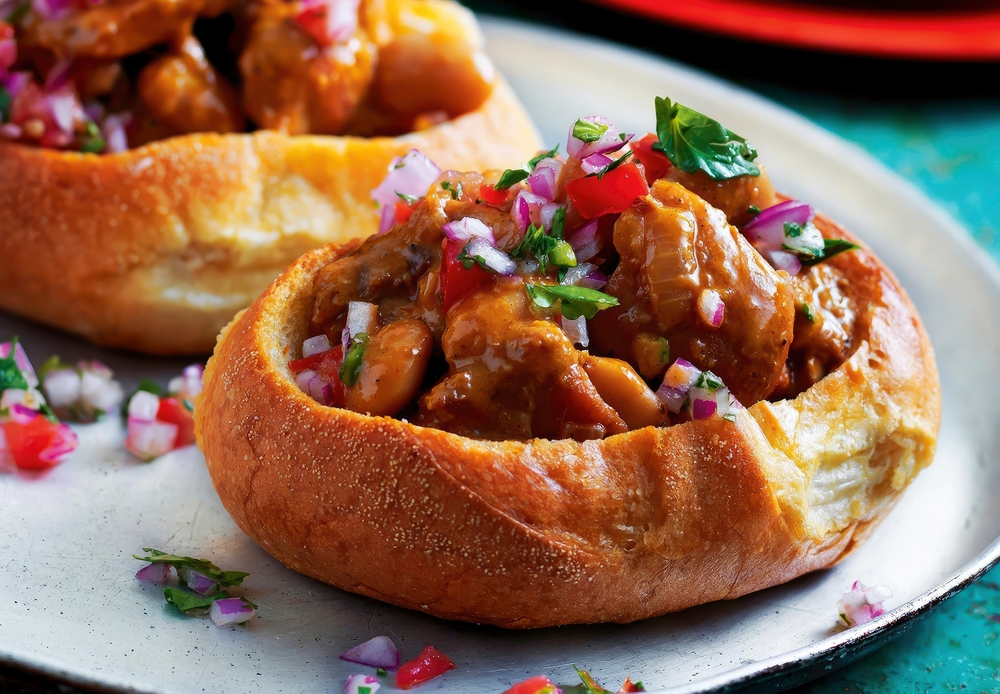
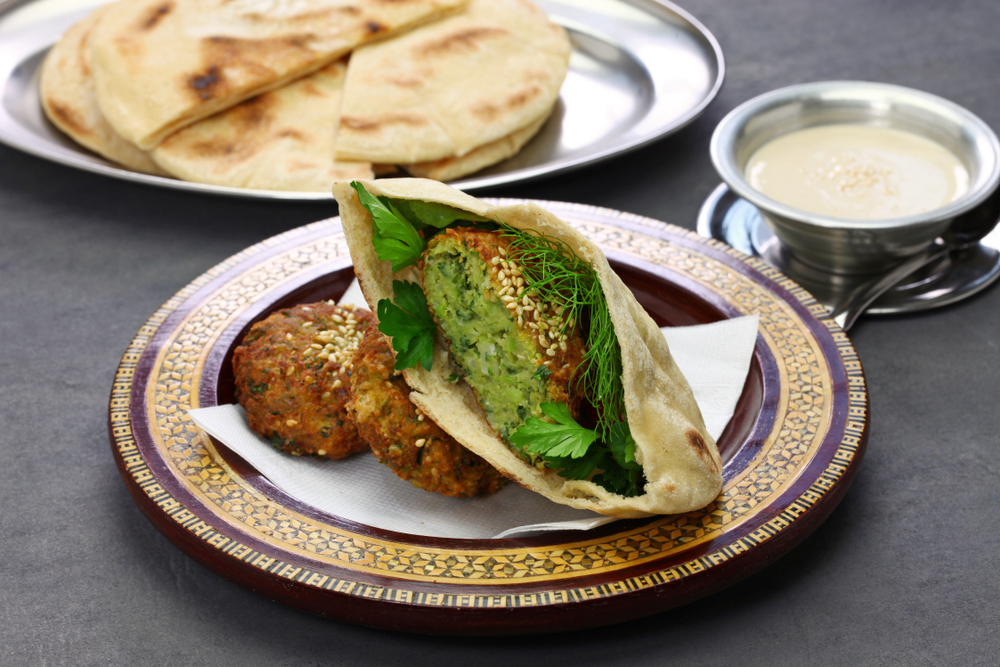
Tanzania offers a culinary landscape as diverse and vibrant as its geography. From the bustling streets of Dar es Salaam to the serene beaches of Zanzibar, every corner tells a delicious story. Delve deeper into the rich tapestry of Tanzanian flavors and traditions. Experience spicy street foods, hearty home-cooked meals, and sweet delicacies that have been cherished for generations. Every dish has a story, every flavor a history. To truly embrace the essence of this East African gem, explore our Tanzanian Cuisine Hub. Dive into recipes, histories, and cultural insights that will not only satiate your appetite but also feed your curiosity. Embark on this culinary journey and celebrate the diverse gastronomic treasures of Tanzania with us. Don’t just read—taste, cook, and immerse yourself in every bite!

Discover the Authentic Taste of Swazi Sishwala: A Traditional Recipe from Eswatini

Introduction to Swazi Sishwala

Swazi Sishwala is a delicious and traditional dish from the beautiful country of Eswatini, located in Southern Africa. This dish holds a special place in the hearts of the Swazi people as it represents their cultural heritage and culinary traditions. The name “Sishwala” refers to the main ingredient used in this dish, which is maize meal. In this article, I will take you on a gastronomic journey to explore the history and cultural significance of Swazi Sishwala, as well as provide you with a step-by-step guide to prepare this authentic dish in your own kitchen.

History and Cultural Significance of Swazi Sishwala

Swazi Sishwala has been a staple food in Eswatini for centuries and is deeply intertwined with the country’s history and culture. Maize, the main ingredient of Sishwala, was introduced to the region by Portuguese traders in the 16th century, and it quickly became a vital crop for the Swazi people. Maize was not only easy to grow in the region’s fertile soil, but it also provided sustenance during times of drought and famine.

Sishwala holds a significant place in Swazi traditions and is often served during special occasions and cultural ceremonies. It is a symbol of unity and community, as it is traditionally eaten from a communal pot, where family and friends gather to share a meal. Sishwala represents the pride and resilience of the Swazi people, showcasing their ability to turn simple ingredients into a nourishing and satisfying dish.

Ingredients and Quantities Required for Swazi Sishwala

To prepare Swazi Sishwala, you will need the following ingredients:

  • 2 cups of maize meal
  • 4 cups of water
  • 1 teaspoon of salt

The quantities mentioned above can be adjusted according to your preference and the number of servings you wish to prepare. Maize meal is readily available in most grocery stores, but if you want to truly experience the authentic taste of Swazi Sishwala, try to source locally-grown maize meal from Eswatini.

Step-by-Step Guide to Preparing Swazi Sishwala

  1. In a large pot, bring the water to a boil.
  2. Slowly add the maize meal to the boiling water, stirring continuously to prevent lumps from forming.
  3. Reduce the heat to low and cover the pot with a lid. Let the mixture simmer for about 30 minutes, stirring occasionally to prevent sticking.
  4. After 30 minutes, remove the lid and add the salt. Stir well to incorporate the salt into the mixture.
  5. Continue cooking the Sishwala for another 15 minutes, or until the mixture reaches a thick and smooth consistency.
  6. Remove the pot from the heat and let it sit for a few minutes to cool down slightly.
  7. Serve the Swazi Sishwala hot, either as a main dish or as a side dish to accompany other traditional Swazi dishes.

Tips for Achieving the Authentic Taste of Swazi Sishwala

To achieve the authentic taste of Swazi Sishwala, here are a few tips:

  1. Use locally-sourced maize meal from Eswatini, if possible. The quality and flavor of the maize meal can greatly impact the final taste of the dish.
  2. Stir continuously while adding the maize meal to the boiling water to prevent lumps from forming. This will ensure a smooth and creamy texture.
  3. Simmer the Sishwala on low heat for the recommended time to allow the flavors to develop fully.
  4. Add the salt towards the end of the cooking process to prevent the maize meal from becoming too soft.
  5. Serve the Sishwala hot, as it tastes best when enjoyed fresh from the pot.

Health Benefits of Swazi Sishwala

Swazi Sishwala not only delights the taste buds but also offers several health benefits. Maize meal, the main ingredient in Sishwala, is a good source of dietary fiber, which aids digestion and promotes a healthy gut. It is also rich in essential vitamins and minerals, such as vitamin B6, magnesium, and phosphorus.

Additionally, Sishwala is a low-fat and cholesterol-free dish, making it a suitable option for those following a heart-healthy diet. The simplicity of the ingredients used in Sishwala ensures that it is a wholesome and nutritious meal that can be enjoyed by people of all ages.

Variations and Adaptations of Swazi Sishwala

While the traditional Swazi Sishwala recipe remains a favorite among many, there are also variations and adaptations of this dish that cater to different tastes and dietary preferences. Some popular variations include adding cooked vegetables, such as spinach or pumpkin, to the Sishwala mixture to enhance its nutritional value and flavor.

For those who prefer a sweeter version of Sishwala, a teaspoon of sugar can be added to the mixture during the cooking process. This subtle sweetness adds a delightful twist to the traditional recipe.

Where to Find Swazi Sishwala in Eswatini

If you have the opportunity to visit Eswatini, experiencing the authentic taste of Swazi Sishwala is a must. You can find this traditional dish in local restaurants, markets, and even at cultural events and festivals. The warm and welcoming people of Eswatini take great pride in their culinary heritage and would be more than happy to share their beloved dish with you.

Conclusion and Final Thoughts on Swazi Sishwala

Swazi Sishwala is more than just a dish; it is a testament to the rich history, culture, and resilience of the Swazi people. This simple yet flavorful maize meal dish has been enjoyed by generations and continues to be an essential part of Swazi cuisine. By following the step-by-step guide and tips provided in this article, you can recreate the authentic taste of Swazi Sishwala in your own kitchen, allowing you to experience a slice of Eswatini’s vibrant culture and flavors. So go ahead, gather your loved ones, and embark on a culinary adventure with Swazi Sishwala.

CTA: Explore the diverse cuisine of Eswatini and try Swazi Sishwala today! Share your experience and let us know how you enjoyed this traditional dish.

Bananas in Palm Oil Recipe From Gabon

Bananas in Palm Oil: A Symphony of Flavors from Gabon

In the heart of Gabonese culinary tradition lies a simple yet profoundly flavorful dish: Bananas in Palm Oil. Combining the natural sweetness of bananas with the rich, earthy tones of palm oil, this dish offers a harmonious blend of taste and texture, evoking the essence of Gabon’s rich gastronomic heritage.

A Culinary Heritage: The Roots of Bananas in Palm Oil

Both bananas and palm oil hold significant places in the culinary and cultural narratives of Gabon. The fusion of these ingredients not only speaks to the nation’s resourcefulness but also showcases its affinity for creating flavorsome, nutrient-rich dishes that resonate with generations.

Crafting the Dish: Ingredients & Quantities

  • 6 ripe bananas, peeled
  • 3 tbsp palm oil
  • 1-2 tsp chili powder (optional, adjust to preference)
  • Salt to taste

Step-by-Step: Making Bananas in Palm Oil

  1. Prepping the Bananas: Slice the bananas into thick rounds or longitudinally, depending on preference.
  2. In a skillet, heat the palm oil over medium heat until it’s slightly shimmering. Add the sliced bananas to the skillet.
  3. Fry the bananas, turning occasionally, until they’re beautifully golden and have absorbed some of the palm oil’s rich color. This should take about 5-7 minutes.
  4. If desired, sprinkle with chili powder for a hint of spice and season with salt. Adjust seasonings to taste.
  5. Once done, transfer the bananas to a serving plate, drizzling any residual palm oil from the skillet over them.

Tip: This dish is best served warm. It can be enjoyed as a standalone treat or paired with savory dishes for a delightful contrast.

Beyond a Dish: The Cultural Resonance of Bananas in Palm Oil

In Gabon, food isn’t just sustenance; it’s a tapestry of history, values, and shared experiences. Bananas in Palm Oil, with its simplicity and depth of flavor, embodies the nation’s commitment to utilizing local produce in ways that honor traditions while tantalizing modern palates.

Peeling Back the Layers: Bananas in Palm Oil FAQs

1. What type of bananas are best for this recipe?

Ripe but firm plantains or dessert bananas are ideal. Their natural sweetness juxtaposes beautifully with the palm oil’s richness.

2. Is there a specific type of palm oil required?

Red, unrefined palm oil is traditional for this dish, imparting a distinct color and flavor. Ensure that the palm oil is sustainably sourced.

3. Can I add other spices to the dish?

Absolutely! While chili powder offers a hint of heat, feel free to experiment with spices like nutmeg or cinnamon for a different flavor profile.

4. What’s the significance of palm oil in Gabonese cuisine?

Palm oil is a staple in many West and Central African countries, including Gabon. It’s valued for its rich taste, nutritional benefits, and versatility in various dishes.

5. How can I make this dish vegan-friendly?

The basic recipe for Bananas in Palm Oil is already vegan. Just ensure the accompanying dishes or garnishes are vegan too, if serving as part of a larger meal.

Experience Gabon’s culinary gem and other African street food masterpieces with us.

Brochettes Recipe From Cameroon

Brochettes: Savoring Cameroon on a Stick

In the diverse culinary palette of Cameroon, Brochettes reign supreme. These skewered delights, typically grilled over open flames, bring together rich marinades and fresh ingredients, offering a taste of Cameroonian tradition and passion for flavors in every bite.

Skewering Traditions: The Brochette’s Place in Cameroonian Culinary History

Cameroon’s culinary tapestry, woven with influences from its various ethnic groups, has always celebrated the art of grilling. Brochettes, with their communal and celebratory nature, have been at the heart of many gatherings, from family feasts to local festivals, symbolizing unity and shared heritage.

Mastering Brochettes: Ingredients & Quantities

  • 500g beef, chicken, or fish, cut into cubes
  • 1 large onion, chopped
  • 2 cloves garlic, minced
  • 1 tbsp ginger, minced
  • 2 tbsp soy sauce
  • 1 tbsp white vinegar or lemon juice
  • 1 tsp chili powder (adjust to preference)
  • Salt and pepper to taste
  • Vegetable options: bell peppers, tomatoes, onions, cubed and deseeded
  • Wooden or metal skewers

Step-by-Step: Crafting Authentic Cameroonian Brochettes

  1. Marinating the Protein: In a large bowl, combine chopped onions, garlic, ginger, soy sauce, vinegar or lemon juice, chili powder, salt, and pepper. Add the cubed protein of choice, ensuring it’s well-coated with the marinade. Let it marinate for at least 2 hours, preferably overnight in the refrigerator.
  2. If using wooden skewers, soak them in water for about 30 minutes to prevent them from burning during grilling.
  3. Preheat the grill to medium-high heat. While the grill is heating, thread the marinated protein and vegetables alternately onto the skewers.
  4. Place the skewers on the grill and cook, turning occasionally, until the protein is fully cooked and has a nice char on the outside, about 10-15 minutes.
  5. Remove the brochettes from the grill and serve immediately, preferably with a side of spicy pepper sauce or salad.

Tip: Brochettes can also be cooked on a stovetop grill pan if an outdoor grill is unavailable.

More Than Grilled Delights: Brochettes in Cameroonian Culture

Brochettes transcend mere culinary enjoyment in Cameroon. They are a symbol of communal dining, shared stories, and the nation’s rich tapestry of cultures and traditions. Whether savored under the vast African sky or in the heart of bustling markets, Brochettes embody the spirit of Cameroon.

Unwrapping the Layers: Brochettes FAQs

1. Can I use other meats for Brochettes?

Yes, Brochettes are versatile. While beef is common, you can use chicken, fish, lamb, or even tofu for a vegetarian variant.

2. What sides are traditionally served with Brochettes in Cameroon?

Brochettes are often accompanied by spicy pepper sauces, grilled plantains, or simple salads. They’re also enjoyed with staples like jollof rice or fufu.

3. Are Brochettes unique to Cameroon?

While skewered and grilled meats are found globally, Cameroonian Brochettes have a unique flavor profile influenced by local spices and culinary traditions.

4. How can I enhance the flavor of my Brochettes?

Marinating the protein for longer periods, using fresh herbs, and incorporating traditional spices can elevate the taste of your Brochettes.

5. Is there a vegetarian version of Brochettes?

Absolutely! Vegetables like bell peppers, mushrooms, and zucchini can be skewered and grilled. Tofu or tempeh are also popular protein replacements for a meat-free Brochette.

Cameroon’s Brochettes and more await in our journey through African street food delicacies.

Beignets Recipe From Congo

Beignets: Congo’s Answer to the Perfect Sweet Treat

Every bite of a Congolese Beignet promises a burst of sweetness and a touch of nostalgia. These golden-brown delicacies, lightly dusted with sugar, have become an integral part of breakfasts and tea times in Congo, offering a blend of simplicity, flavor, and tradition.

A Sugary Tale: The Journey of Beignets in Congo

While beignets have origins in various parts of the world, Congo has embraced and adapted this treat to its tastes and preferences. Deep-fried to perfection and often accompanied by a cup of tea or coffee, Beignets represent moments of togetherness and the sweet simplicity of Congolese culinary arts.

Preparing Beignets: Ingredients & Quantities

  • 2 cups all-purpose flour
  • 1/2 cup granulated sugar
  • 2 tsp active dry yeast
  • 1 cup warm water
  • 1/2 tsp salt
  • Oil for frying
  • Additional sugar for dusting (optional)

Step-by-Step: Making Fluffy Beignets

  1. Preparing the Dough: In a large bowl, mix the yeast with warm water and let it sit for about 5 minutes until frothy.
  2. Add flour, sugar, and salt to the yeast mixture. Mix until a sticky dough forms. Cover the bowl with a damp cloth and let the dough rise in a warm place for about 1-2 hours, or until it has doubled in size.
  3. Heat oil in a deep frying pan over medium heat.
  4. While the oil is heating, take portions of the risen dough and shape them into small balls or discs.
  5. Carefully drop the dough portions into the hot oil, frying in batches to avoid overcrowding. Fry until golden brown on all sides, which should take about 2-3 minutes.
  6. Using a slotted spoon, remove the beignets from the oil and drain them on paper towels. While still warm, you can optionally dust them with additional sugar for an extra touch of sweetness.

Tip: Ensure the frying oil is at the right temperature. Too hot, and the beignets will brown too quickly without cooking through. Too cold, and they’ll become oily.

More Than Just Sweets: Beignets in the Heart of Congolese Culture

Beignets, over time, have become synonymous with moments of joy, family gatherings, and morning rituals in many Congolese homes. Their ubiquity in local markets and households alike showcases the nation’s love for simple pleasures and time-honored traditions.

Delving Deeper: Beignets FAQs

1. How are Congolese Beignets different from other beignets?

While the basic principle remains the same, Congolese Beignets are distinguished by their simplicity, often devoid of fillings or additional flavorings common in other variations.

2. Can I add flavorings to the dough?

Yes! Some people enjoy adding a touch of vanilla, lemon zest, or even coconut to the dough for an extra layer of flavor.

3. How are Beignets typically served in Congo?

Traditionally, Beignets are served warm, often with a sprinkling of sugar. They’re commonly enjoyed with tea or coffee in the mornings or as an afternoon snack.

4. Can I store leftover Beignets?

Beignets are best consumed fresh. However, if needed, they can be stored in an airtight container for a day. Reheat in an oven to regain some of their crispiness before serving.

5. Are Beignets suitable for vegetarians?

Absolutely. The basic Congolese Beignet recipe contains no animal products, making it suitable for vegetarians.

Congo’s Beignets are a testament to the incredible African street food culture. Discover more!

Boerewors Roll From South Africa

Boerewors Roll: The Ultimate South African Street Food

When it comes to iconic South African flavors, the Boerewors Roll stands tall. This simple yet mouthwatering combination of a grilled boerewors sausage nestled in a soft bread roll, usually complemented by saucy toppings, is a crowd-pleaser at barbecues, sports events, and street corners across the nation.

Sizzling Through Time: The Origin of the Boerewors Roll

Deeply rooted in South African culture, the Boerewors Roll borrows its name from “boerewors” – a traditional South African sausage with a flavorful spice mix. Evolving from farm barbecues and community gatherings, this dish has become an emblem of South African unity and celebration.

Crafting the Perfect Boerewors Roll: Ingredients & Quantities

  • 1 boerewors sausage coil (about 500g)
  • 4 fresh bread rolls
  • 1 large onion, sliced into rings
  • 2 tbsp butter or oil
  • Condiments of choice (e.g., tomato sauce, mustard, chutney)

Step-by-Step: Assembling the Quintessential Boerewors Roll

  1. Grilling the Boerewors: Preheat the grill or barbecue to medium-high heat. Grill the boerewors coil, turning regularly to ensure even cooking, for about 15-20 minutes or until browned and cooked through. Remove from the grill and let it rest for a few minutes. Slice into portions that fit the length of the bread rolls.
  2. Caramelizing Onions: In a frying pan, melt butter or heat oil over medium heat. Add sliced onions and sauté until soft and caramelized. This should take about 10-15 minutes.
  3. Slit the bread rolls without cutting all the way through. Place a grilled boerewors portion inside each roll. Top with caramelized onions and your choice of condiments.
  4. Serve hot with a side of coleslaw or potato salad for a hearty meal.

Tip: For an authentic experience, pair the Boerewors Roll with a cold South African beverage, like a craft beer or a refreshing soft drink.

Beyond a Roll: The Cultural Essence of the Boerewors Roll

The Boerewors Roll is more than just a delicious snack. It encapsulates the spirit of South African “braais” (barbecues) and social gatherings, symbolizing communal unity, shared history, and the nation’s diverse culinary landscape.

Unraveling the Boerewors Roll: FAQs

1. What makes boerewors sausage unique?

Boerewors is known for its distinctive spice mix, usually including coriander, cloves, and nutmeg, giving it a flavor profile that’s unmistakably South African.

2. Can other sausages be used for a Boerewors Roll?

While other sausages can be used, the unique taste of boerewors is central to the authentic Boerewors Roll experience.

3. Are there variations to the classic Boerewors Roll toppings?

Yes! While caramelized onions and tomato sauce are traditional, many enjoy additions like pickled jalapeños, chutney, or even grilled peppers.

4. How is the Boerewors Roll different from a hotdog?

While both are sausages in buns, the Boerewors Roll is characterized by its uniquely spiced sausage and its cultural significance in South African gatherings.

5. Is the Boerewors Roll a main dish or a snack?

Both! Depending on the occasion, it can be a filling main dish or a satisfying snack on the go.

Discover the Boerewors Roll and the rich tapestry of African street dishes with our guide.

Vetkoek Recipe From South Africa

Vetkoek: The Golden, Crispy Delight of South Africa

From the vibrant streets of Johannesburg to serene South African townships, the enticing aroma of freshly fried Vetkoek (pronounced “fet-cook”) wafts through the air. This golden, crispy bread, light on the inside and deliciously crispy on the outside, embodies the heart and soul of traditional South African comfort food.

A Legacy in Dough: The Vetkoek Story

Tracing its roots to South Africa’s early settlers, Vetkoek’s origins are a testament to adaptability and culinary innovation. A simple yet versatile dish, Vetkoek has stood the test of time, evolving with each generation and becoming an emblematic feature of South African culinary heritage.

Crafting Vetkoek: Ingredients & Quantities

  • 4 cups all-purpose flour
  • 1 sachet (10g) instant yeast
  • 1 tsp sugar
  • 1 tsp salt
  • Approximately 2 cups warm water
  • Oil for deep frying

Step-by-Step: Achieving the Perfect Vetkoek

  1. Dough Preparation: In a large mixing bowl, combine the flour, yeast, sugar, and salt. Gradually add the warm water, mixing continuously, until a soft dough forms.
  2. Knead the dough on a floured surface for about 10 minutes or until it’s smooth and elastic. Place the dough back in the bowl, cover with a damp cloth, and let it rise in a warm place for about 1-2 hours, or until doubled in size.
  3. Once risen, divide the dough into golf ball-sized portions. Flatten each ball slightly to form a disc shape.
  4. Heat the oil in a deep frying pan over medium heat. Once hot, carefully lower the dough discs, a few at a time, into the hot oil. Fry until golden brown on both sides, turning occasionally to ensure even coloring.
  5. Remove the Vetkoek from the oil using a slotted spoon and place them on paper towels to absorb any excess oil.
  6. Serve hot. Vetkoek is versatile and can be enjoyed with sweet or savory fillings – from jam and cheese to minced meat or chicken curry.

Tip: For a slightly different texture and flavor, some chefs use a combination of bread flour and all-purpose flour in their Vetkoek recipes.

More Than Just Bread: Vetkoek in the Heart of South Africa

Vetkoek is more than a culinary treat; it’s a reflection of South African culture, heritage, and community. Whether enjoyed as a snack on the go, a meal with family, or a treat during gatherings, Vetkoek remains an indelible part of South Africa’s gastronomic identity.

Sinking Teeth into Details: Vetkoek FAQs

1. What does “Vetkoek” mean?

“Vetkoek” directly translates to “fat cake” in Afrikaans, referencing its deep-fried nature.

2. Are there variations to the traditional Vetkoek?

Yes! While the basic recipe remains consistent, variations include adding spices or herbs to the dough or experimenting with diverse fillings, from sweet to spicy.

3. Can Vetkoek be made ahead of time?

While Vetkoek is best enjoyed fresh and hot, the dough can be made ahead of time and stored in the refrigerator. Just allow it to come to room temperature before frying.

4. Is Vetkoek similar to doughnuts?

While both are deep-fried, Vetkoek is typically less sweet than doughnuts and is often enjoyed with savory fillings, making it more versatile.

5. How is Vetkoek traditionally served in South Africa?

Traditionally, Vetkoek can be sliced open and filled with curried minced meat, but it’s also commonly paired with sweet jams, cheeses, or even honey.

Join us as we explore Vetkoek and other African street food classics.

Bunny Chow Recipe From South Africa

Bunny Chow: A Mouthful of South African History and Flavor

Amidst the diverse culinary landscape of South Africa, one dish has captivated hearts and appetites alike – the Bunny Chow. A hollowed-out loaf of bread generously filled with spicy curry, Bunny Chow offers a hearty meal and a bite into the rich tapestry of South African cultural influences.

Bunny Chow’s Tale: From Durban to the World

Born in the vibrant Indian community of Durban, Bunny Chow has its roots in the necessity and ingenuity of Indian laborers who needed a portable meal. This dish not only reflects South Africa’s multicultural essence but also stands as a testament to the adaptability and creativity of its people.

Constructing a Bunny Chow: Ingredients & Quantities

  • For the curry filling:
    • 500g chicken or beef, diced
    • 2 large onions, finely chopped
    • 3 cloves garlic, minced
    • 1 tbsp ginger, grated
    • 2 tbsp curry powder (adjust to preference)
    • 1 tsp turmeric powder
    • 2 tomatoes, pureed
    • 2 potatoes, diced
    • 1 bay leaf
    • Salt to taste
    • Oil for cooking
  • 1 medium-sized loaf of white bread

Step-by-Step: Crafting the Perfect Bunny Chow

  1. Preparing the Curry: In a large pot, heat oil over medium heat. Sauté onions until translucent. Add garlic and ginger, cooking for another 2 minutes.
  2. Stir in the curry powder, turmeric, and bay leaf. Fry the spices briefly until aromatic. Add the diced meat, ensuring it is well-coated with the spices. Brown the meat on all sides.
  3. Add the pureed tomatoes to the pot, followed by the diced potatoes. Add salt and enough water to cover the ingredients. Bring to a boil, then reduce heat and simmer until the meat is tender and the curry is thickened.
  4. Assembling the Bunny Chow: Cut the bread loaf into quarters. Hollow out the center of each quarter, leaving a thick bread wall. Fill the hollowed bread generously with the prepared curry. Optionally, use the scooped-out bread as a ‘lid’ or simply as an accompaniment to soak up the curry.
  5. Best served hot. Dive in using your fingers for the authentic Bunny Chow experience!

Tip: While chicken and beef are popular choices, Bunny Chow can also be made with lamb, pork, or even vegetarian fillings.

Beyond Food: Bunny Chow as a Cultural Icon

In the heart of South African street food culture, Bunny Chow stands not just as a dish, but as a symbol of unity, collaboration, and shared history. Its story of origin and evolution mirrors the nation’s journey through challenges and triumphs.

Diving Deeper: Bunny Chow FAQs

1. Why is it called “Bunny” Chow?

The term “bunny” is derived from the word “bania”, referring to the Indian merchant class who are believed to have created this dish.

2. Is Bunny Chow found outside South Africa?

While quintessentially South African, Bunny Chow’s fame has spread globally, with variations being offered in restaurants worldwide. However, for the authentic taste, Durban remains the place to be.

3. How do I eat Bunny Chow?

The traditional way is to dive in with your fingers, using the bread to scoop up the curry. It’s a deliciously messy affair that’s part of the Bunny Chow charm.

4. Are there variations to the classic Bunny Chow?

Absolutely! From the choice of meat to vegetarian options with beans or lentils, the possibilities are as diverse as South Africa itself.

5. How did a dish of Indian origins become a South African staple?

The blending of Indian flavors with South African ingredients and sensibilities led to the birth of Bunny Chow. Over time, its taste and the story resonated with diverse communities, making it a beloved national dish.

Bunny Chow is a standout in the diverse realm of African street eats. Learn more about it!

Mahjouba Recipe From Algeria

Mahjouba: A Glimpse into Algeria’s Culinary Treasures

In the lively streets of Algiers, amidst aromatic spices and vibrant stalls, Mahjouba stands out as a true Algerian gem. These savory stuffed crepes, filled with a delectable mixture of tomatoes and onions, are a testament to Algeria’s rich tapestry of flavors and culinary traditions.

Rolling through Time: Mahjouba’s Legacy

The origins of Mahjouba can be traced back to Algeria’s Berber roots. A beloved street food and home-cooked delight, Mahjouba captures the essence of traditional Algerian flavors, seamlessly blending history with gastronomy.

Creating Mahjouba: Ingredients & Quantities

  • For the dough:
    • 2 cups fine semolina
    • 1 cup all-purpose flour
    • Water, as needed
    • 1 tsp salt
  • For the filling:
    • 4 medium tomatoes, finely chopped
    • 1 large onion, finely chopped
    • 2 cloves garlic, minced
    • 1 tsp ground cumin
    • 1 tsp paprika
    • Salt and pepper to taste
    • 2 tbsp olive oil
  • Oil for frying

Step-by-Step: Crafting Delightful Mahjouba

  1. Dough Preparation: In a mixing bowl, combine the semolina, flour, and salt. Gradually add water, mixing continuously, until a smooth dough forms. Knead for a few minutes, then cover and set aside for at least an hour.
  2. Filling Preparation: In a skillet, heat the olive oil over medium heat. Add onions and sauté until translucent. Stir in the garlic, followed by the tomatoes. Season with cumin, paprika, salt, and pepper. Cook until the mixture thickens and the tomatoes break down. Set aside to cool.
  3. On a floured surface, take a portion of the dough and roll it into a thin circle. Place a spoonful of the filling in the center and spread evenly, leaving a small border around the edge. Fold the edges over the filling, forming a square package.
  4. Heat a bit of oil in a frying pan over medium heat. Place the stuffed crepe in the pan and cook until golden brown on both sides, approximately 2-3 minutes per side.
  5. Remove the Mahjouba from the pan and place on paper towels to absorb any excess oil. Serve warm.

Tip: Mahjouba pairs wonderfully with harissa or a simple yogurt sauce.

More Than Just Crepes: Mahjouba in Algerian Life

Mahjouba is a reflection of Algeria’s diverse culinary influences and history. Often enjoyed during special gatherings, this dish is not only a treat for the taste buds but also a symbol of Algeria’s rich cultural heritage and the warmth of its people.

Diving Deeper: Mahjouba FAQs

1. Can Mahjouba be prepared with different fillings?

Absolutely. While the tomato-onion mixture is traditional, variations with meat, cheese, or even spicy peppers can be found across Algeria.

2. How long can Mahjouba be stored?

Mahjouba is best enjoyed fresh. However, if stored in an airtight container, it can last for a couple of days in the refrigerator. Reheat in an oven or on a skillet to revive its crispiness before serving.

3. Is Mahjouba unique to Algeria?

While similar stuffed crepes can be found in other North African and Mediterranean countries, Mahjouba’s specific preparation and flavors are distinctly Algerian.

4. Can Mahjouba be made gluten-free?

Yes, by using gluten-free flour alternatives and ensuring all other ingredients are gluten-free, you can easily make a gluten-free version of Mahjouba.

5. What drinks pair well with Mahjouba?

A glass of mint tea or a light Algerian wine can complement the savory flavors of Mahjouba beautifully.

Experience Mahjouba and other African street food wonders in our extensive collection.

Ta’ameya Recipe From Egypt

Ta’ameya: Egypt’s Signature Fava Bean Falafel

In the bustling streets of Cairo, amidst the scent of spices and fresh bread, one aroma stands distinct: freshly fried Ta’ameya. Recognized as Egypt’s take on falafel, Ta’ameya offers a delightful crunch on the outside, soft and flavorful on the inside, making it a favorite among locals and tourists alike.

From Ancient Times: The Journey of Ta’ameya

Boasting roots that trace back to Pharaonic Egypt, Ta’ameya has been a staple in Egyptian diets for centuries. Historically consumed during Christian Lent, this dish transcended religious boundaries and soon became an everyday delicacy relished across the nation.

Whipping Up Ta’ameya: Ingredients & Quantities

  • 2 cups dried split fava beans, soaked overnight
  • 1 large onion, roughly chopped
  • 3 cloves of garlic, minced
  • 1 cup fresh parsley, finely chopped
  • 1 cup fresh coriander, finely chopped
  • 1 tsp ground cumin
  • 1 tsp baking soda
  • Salt and pepper to taste
  • Oil for frying
  • Sesame seeds (optional, for coating)

Step-by-Step: Creating Crispy Ta’ameya

  1. Bean Preparation: After soaking the fava beans overnight, drain them and blend in a food processor until a smooth paste forms.
  2. Add onions, garlic, parsley, coriander, cumin, salt, and pepper to the bean paste. Blend until everything is well-integrated and the mixture is fairly smooth.
  3. Stir in baking soda and let the mixture rest for 30 minutes, allowing it to rise slightly.
  4. Heat oil in a deep frying pan over medium heat. If you’re using sesame seeds, place them in a shallow dish.
  5. Shape the bean mixture into small patties or balls. If desired, press one side of each patty into the sesame seeds.
  6. Fry the Ta’ameya in batches, ensuring they turn golden brown and are crispy on the outside. This should take about 3-5 minutes.
  7. Remove with a slotted spoon, letting excess oil drip off, and transfer to paper towels to drain.
  8. Serve hot, preferably with tahini sauce or a simple salad. Ta’ameya also makes an excellent filling for pita bread sandwiches.

Tip: Ensure the oil is hot enough before frying. Test by dropping a small piece of the mixture into the oil; it should sizzle immediately and float to the top.

More Than Just Food: Ta’ameya in the Egyptian Heartbeat

Ta’ameya is not merely a dish; it’s an embodiment of Egyptian culture. Representing affordable, nutritious, and flavorful street food, it is a testament to Egypt’s rich culinary history and the nation’s love for hearty meals.

Delving Deeper: Ta’ameya FAQs

1. How is Ta’ameya different from other falafels?

The primary distinction lies in the beans used. While most falafels are made with chickpeas, Ta’ameya uses fava beans, granting it a unique taste and texture.

2. Can Ta’ameya be baked?

Yes, for a healthier variant, Ta’ameya can be baked. Though they won’t be as crispy as the fried version, they will still be delicious.

3. What are the best accompaniments for Ta’ameya?

Ta’ameya pairs wonderfully with tahini sauce, pickled vegetables, and fresh salads. It’s often stuffed in pita bread with these accompaniments for a fulfilling sandwich.

4. Can Ta’ameya be frozen for later use?

Yes, you can freeze the shaped, uncooked Ta’ameya. When ready to eat, fry or bake them directly from the freezer without thawing.

5. Is Ta’ameya specific only to Egypt?

While its roots are Egyptian, variations of Ta’ameya can be found in other Middle Eastern and North African countries, each with its unique twist.

Dive deeper into African street food adventures with dishes like Egypt’s Ta’ameya.