Home Blog Page 27

The Vibrant Role of Ginger in African Cooking Traditions

Unveiling the Zesty Secrets of Ginger in African Cuisine

Welcome to a spice odyssey where we explore the zest and zing of ginger in African culinary traditions. This versatile root, known for its fiery yet warm essence, is a cornerstone in the diverse tapestry of flavors that define African dishes. From the bustling streets of Cairo to the serene landscapes of the Serengeti, ginger is a revered ingredient that brings life to every meal.

Ginger: The Spicy Root that Revitalizes Your Recipes

Ginger is a versatile ingredient that can be used in sweet and savory dishes alike. It’s known for its unique combination of zestiness and warmth, which can enhance the flavor profile of your meals. Below is a guide on how to use ginger in your cooking.

Using Fresh Ginger

Fresh ginger can be minced, grated, or sliced thinly to infuse its flavor into a variety of dishes. It’s perfect for stir-fries, marinades, and even tea. Remember, a little goes a long way with fresh ginger.
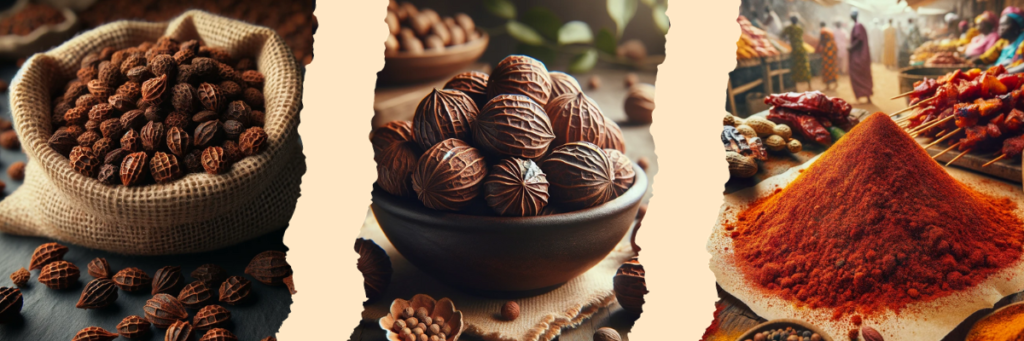
Dried Ginger

Dried ginger has a more concentrated flavor and is typically used in powdered form. It’s a staple in spice blends and is excellent for baking, adding a warm, spicy note to cookies, cakes, and other desserts.

Pickled Ginger

Pickled ginger, often served with sushi, is a great palate cleanser. Its sweet and tangy flavor also makes it a delightful addition to salads and noodle dishes.

Candied Ginger

Candied ginger is a sweet treat that can also double as a dessert garnish or a spicy-sweet addition to baked goods. It’s ginger cooked in sugar syrup and air-dried.

Ginger in Drinks

Ginger adds a refreshing kick to beverages. From ginger tea to ginger beer, its spicy undertone can transform your drink into something special.

Ginger: A Versatile Spice for Your Kitchen

Whether it’s fresh, dried, pickled, or candied, ginger can elevate the taste of your dishes. Experiment with this wonderful spice and discover the depth it can add to your culinary creations.

Exploring Ginger in African Cuisine

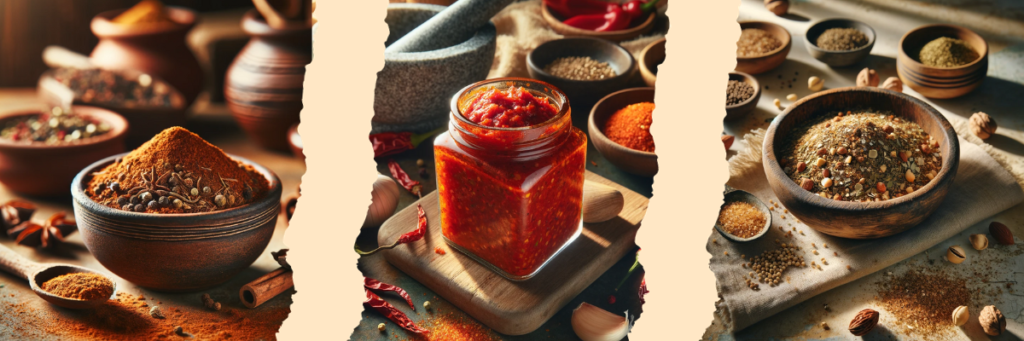
Ginger is a beloved spice that plays a significant role in African cooking. Across the continent, it’s celebrated for its ability to add a warm and spicy kick to both traditional and modern dishes. Here’s how ginger weaves its magic into African cuisine.

Marinades and Meat Dishes

In many African cultures, ginger is used to marinate meats, imparting a rich flavor that penetrates deeply. It’s commonly combined with garlic, chili, and a variety of local spices to create mouthwatering dishes such as kebabs, stews, and grilled meats.

Soups and Stews

From the spicy peanut stews of West Africa to the aromatic soups of North Africa, ginger adds a warm and invigorating flavor that is both comforting and robust. It complements the flavors of tomatoes, onions, and indigenous spices beautifully.

Teas and Beverages

Ginger tea is a popular beverage throughout Africa, known for its medicinal properties and its ability to soothe and warm the body. It’s also a key ingredient in homemade ginger beer, a non-alcoholic, fizzy, and refreshing drink enjoyed across the continent.

Ginger: A Versatile Spice for African Dishes

Whether used in marinades, stews, or beverages, ginger’s pungent and spicy flavor is an essential component of African culinary traditions. It’s a spice that brings warmth, depth, and excitement to the table.

FAQs About Ginger in African Cuisine

How is ginger used in traditional African cooking?

Ginger is used extensively in African cooking, often ground into a paste or grated fresh into marinades, spice rubs, soups, and stews. It’s also used to flavor rice dishes and sauces.

Can ginger be found in African desserts?

Yes, ginger is used in some African desserts, especially in North Africa where it’s added to sweet pastries and confections, often paired with cinnamon and cloves.

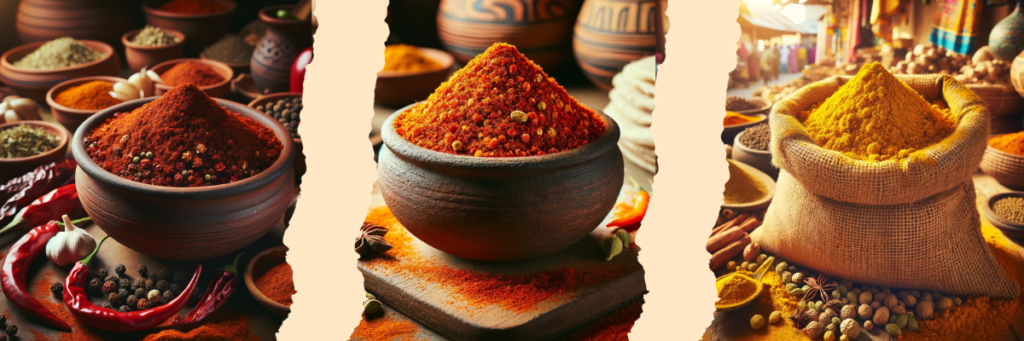
Is ginger used differently in various regions of Africa?

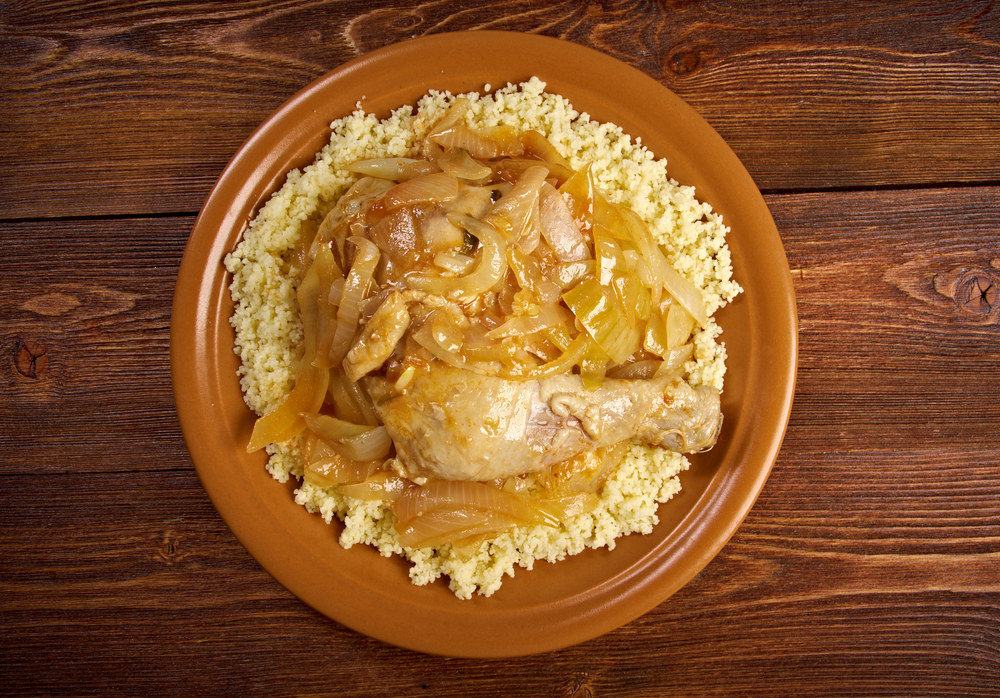
Definitely. In North Africa, ginger is commonly used in dried form as a spice for tagines and couscous dishes. In West and East Africa, fresh ginger is often used in stews, teas, and homemade ginger beers.

What are the health benefits of ginger in African herbal medicine?

Ginger is renowned for its medicinal properties in African herbal medicine. It’s used to treat nausea, aid digestion, reduce inflammation, and as a remedy for colds and flu.

How does the flavor of ginger influence African cuisine?

Ginger brings a warm, spicy, and slightly sweet flavor that’s able to both stand out and blend in with other strong flavors, which is essential in the bold and complex spice mixtures that are characteristic of African cuisine.

Conclusion

In the grand tapestry of African cuisine, ginger stands out as a spice that is both a flavor enhancer and a bridge between the various taste profiles found across the continent. From its medicinal uses to its prominence in festive beverages, ginger’s cultural significance is as rich and deep as its flavor. Embracing ginger in your cooking is an invitation to experience a piece of Africa’s culinary heritage, a journey of taste that promises to be as enlightening as it is delicious.
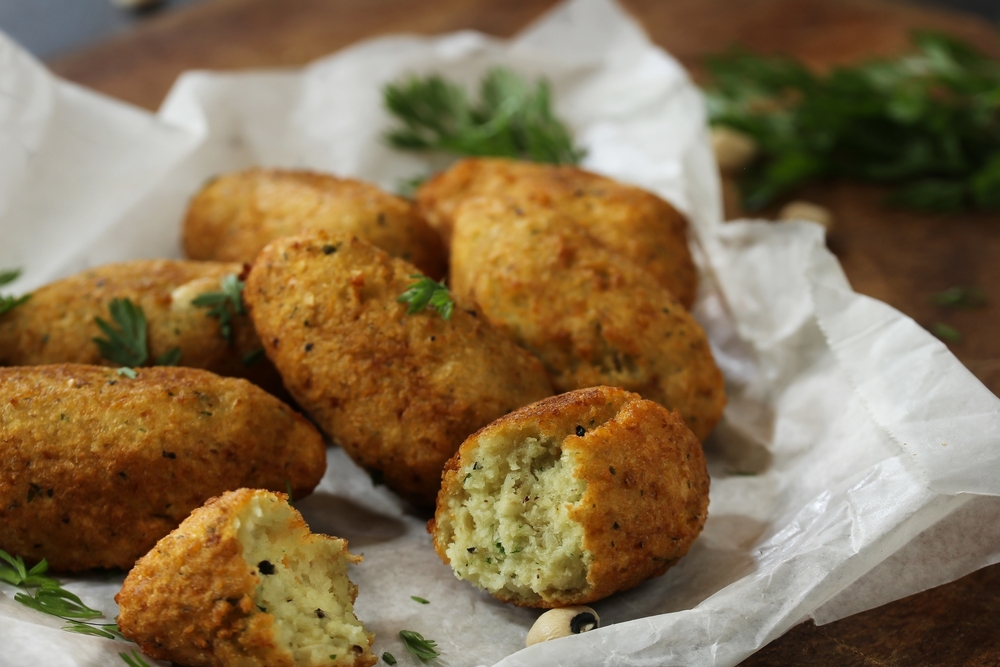
Chapati: Unleashing the Flavors of Africa’s Beloved Flatbread

Introduction to Chapati

Welcome to the world of Chapati, a delectable flatbread that has become a staple in African cuisine. Its simplicity is its elegance, and its versatility makes it a beloved choice for any meal of the day. Join us as we delve into the rich flavors and cultural significance of this exquisite dish.

History and Origins of Chapati

The story of Chapati stretches back centuries, rooted in the heart of African culinary traditions. It’s a tale woven through time, where every fold of the dough carries the whispers of history. This flatbread has not only fed generations but also brought communities together, becoming a symbol of shared meals and stories.

The Chapati Recipe

Ingredients for Chapati

  • 2 cups of whole wheat flour
  • 3/4 cup of water
  • 1/2 teaspoon of salt
  • 1 tablespoon of olive oil

Directions to Make Chapati

Begin your culinary journey by mixing the flour and salt in a large bowl. Gradually add water and knead into a soft, elastic dough. Let it rest, then divide and roll into thin circles. Cook each chapati on a hot griddle until it puffs up, revealing its perfect layers.

Chef’s Tips for Perfect Chapati

To elevate your Chapati from simple to sublime, consider these five expert tips:

  1. Use room-temperature water for a more pliable dough.
  2. Let the dough rest to develop gluten, which will give your Chapati the perfect texture.
  3. Roll evenly for consistent cooking and texture.
  4. Preheat your griddle to ensure a quick and even puffing of the Chapati.
  5. Wrap cooked Chapati in a clean cloth to keep them soft and warm.

Source Local Ingredients for Chapati

For the best Chapati, sourcing high-quality, local ingredients is key. Not only does it support local farmers, but it also ensures the freshest flavors. Consider the season and adapt your recipe to what’s available, making each Chapati a unique reflection of your locale.

Frequently Asked Questions About Chapati

What is the best flour to use for Chapati?

Whole wheat flour is traditionally used, offering a rich flavor and hearty texture that’s characteristic of authentic Chapati.

Can Chapati be made vegan?

Yes, Chapati can easily be made vegan by using water and oil, avoiding any animal products.

How can I store leftover Chapati?

Leftover Chapati should be kept in an airtight container at room temperature and is best enjoyed within a few days.

Is Chapati gluten-free?

Traditional Chapati is not gluten-free as it is made with whole wheat flour, but gluten-free versions can be made with alternative flours.

Can I freeze Chapati dough?

Yes, Chapati dough can be frozen. Be sure to thaw it in the refrigerator before use and allow it to come to room temperature for easy rolling.


Accara (or Akara): Black-eyed Pea Fritters

Savoring the Crunch of West Africa

Accara, delicious black-eyed pea fritters, reigns as a popular street food in many West African countries. Crispy on the outside, soft and flavorful inside, Accara is a delightful snack that exemplifies the rich culinary culture of the region.

Accara: Where Tradition Meets Taste

Originating from West Africa, these fritters have become a cherished treat in households and street stalls alike. Their rich flavor and crispy texture are testament to the timeless appeal of simple ingredients transformed through traditional cooking techniques.

Ingredients for Authentic Accara

  • 2 cups black-eyed peas, soaked overnight and skins removed
  • 1 onion, finely chopped
  • 2 cloves garlic, minced
  • 1 chili pepper, deseeded and chopped (adjust to taste)
  • Salt to taste
  • Vegetable oil for frying

Crafting the Perfect Accara

  1. Blending the Base: In a blender, combine the soaked black-eyed peas, onion, garlic, chili pepper, and salt. Blend to a fairly smooth, thick paste.
  2. Heating the Oil: In a deep frying pan, heat the vegetable oil over medium heat.
  3. Frying the Fritters: Using a spoon, drop dollops of the pea mixture into the hot oil. Fry until they turn golden brown and crispy.
  4. Serving Fresh: Drain the Accara on paper towels and serve while hot. They’re often enjoyed with spicy dipping sauces or as an accompaniment to soups and stews.

Accara: A Bite into West African Heritage

Accara offers a crunchy exploration into the heart of West African culinary traditions. Whether enjoyed as a quick snack, paired with a main dish, or savored with a spicy sauce, Accara carries the flavors and memories of centuries-old cooking practices. As you dive into West African gastronomy, let the delightful crunch of Accara guide your taste buds.

The techniques used in this recipe reflect the unique Senegalese Cooking Methods. Discover the artistry behind other dishes on our main page.

African Spices List: Essential Herbs for Your Pantry

Welcome to the vibrant and flavorful world of African cuisines, where spices and herbs not only tantalize your tastebuds but tell stories of cultures, traditions, and lands rich with culinary history. African spices form the heartbeat of multiple cultures’ cookery, offering distinctive flavors and incredible aromatics specific to different regions of the vast continent. From the bustling markets of Marrakech to the picturesque coastlines of Zanzibar, let’s embark on an exciting journey to explore essential African spices that every gourmand should have in their pantry.

Aromatics of North Africa

north african spices

Ras el Hanout – The Pinnacle of Moroccan Flavor

Ras el Hanout literally translates to “top of the shop,” implying it’s the best blend you could offer from a Moroccan bazaar. Embark on a sensory expedition with its complex mix of cardamom, cumin, cloves, cinnamon, nutmeg, mace, and more. An indispensable medley for tagines and stews, Ras el Hanout marries sweet and savory to magnificently reflect the spirit of Moroccan cooking.

Harissa – The Fiery Tunisian Paste

Pack a punch with Harissa, the fiery and garlicky chili paste that is the backbone of Tunisian cooking. This spicy condiment germinated from the need to preserve chilies and has become a national staple. It features a blend of Baklouti pepper, serrano, and other hot chili peppers combined with herbs and spices like coriander, caraway, and cumin. Incorporate Harissa into soups, stews, and couscous, or use it as a robust spread for an added layer of spice.

Dukkah – Egypt’s Nut and Spice Blend

An ancient Egyptian condiment, Dukkah, revels in its earthiness and nuttiness. This versatile blend composed of toasted nuts like hazelnuts or pistachios, along with coriander, sesame seeds, and cumin, gives it a crunchy texture that’s perfect when sprinkled over dips like hummus, salads, or simply combined with olive oil to scoop up with bread. Beyond its traditional use, let Dukkah invigorate roasted vegetables or your favorite protein.

West African Spice Staples

west african spices

Grains of Paradise – A West African Treasure

Sometimes known by its exotic moniker, the Malagueta pepper, Grains of Paradise carries a taste sensation akin to a peppery symphony with hints of ginger, cardamom, and coriander. These little seeds, encased in vibrant pods, partake in the culinary traditions of West Africa, infusing heat and energy into dishes like kebabs and liberating palates with their musky fragrance. Cherished for centuries for their culinary merits and presumed medicinal properties, they are indeed one of West Africa’s most flavorful treasures.

Calabash Nutmeg – The African Aromatic

Known fondly in locales as ehuri or ariwo, the Calabash nutmeg is a charm of West African indigenous cuisines, where it permeates soups, stews, and piquant meat rubs with its warm and spicy taste profile. This aromatic is fabled for carrying a more rustic, woodsy flavor when compared to its conventional counterpart, jazzing up the simplest of dishes with a distinctively deep essence all its own.

Suya Spice – The Heart of Nigerian Barbecue

Enflame your grilling endeavors with the quintessential Suya spice mix that stands as a pillar of Nigerian street food culture. This potpourri of crushed peanuts fused with smoky spices like paprika, ginger, and onion powder transforms skewered beef chunks into sultry Suya kebabs. This spice brings night markets to life, juxtaposing flavors and heat encapsulating the spirit of Nigerian communal feasts.

East African Aromatic Essential

eastern africa spices

Berbere – The Foundation of Ethiopian Cuisines

Haunting in intensity, the Berbere spice is a tightrope walk of aroma and temper. Ethiopian dishes owe their deep red allure and lingering warm tang to this atavistic blend of crimson with a battalion of spices, chief among them red chili peppers, fenugreek, and paprika. Whether it’s etching complexity into a stew or burnishing the skin of a Doro Wat chicken, Berbere emerges as a mandatory passage to authentic Ethiopian culinary exploration.

Mitmita – An Explosive Ethiopian Blend

A fierier cousin to Berbere, Mitmita is a powdered concoction of punishing potency coy behind an amber facade. Spearheaded by African bird’s eye chili peppers and armored with aromatic adjuncts like cloves and cinnamon, it’s customary for electrifying raw meat dishes or taming succulent cubes of goat in what culminates as a powerful edible opus writ large across beleaguered, yet blissful palates.

Zanzibar Curry Powder – An Island’s Spice Melody

Glean the essence of spice-infused ocean breezes with Zanzibar curry powder, a masterful admixture epitomizing the “Spice Island’s” far-reaching trade history. Invigorant turmeric yields its golden hue to this potpourri, holding court alongside cumin, clove, and cinnamon. Its ensemble nature turns full-bodied curry, invigorates rubs, and ennobles marinades, orchestrating a gastronomical sarabande of flavors encapsulating the East African archipelago’s culinary soul.

Central African Flavor Enhancers

Mbongo Spice – The Cameroonian Secret

The introspective depths of Cameroon’s culinary traditions are best epitomized by Mbongo Spice, an exotic and elusive concoction that lends its name to the nation’s famed ‘Mbongo Tchobi’ black stew. A melody composed of roasted negella seeds, African nutmeg, and aromatic woods, reflects the moody intricacies of rainforest ecosystems. This coveted spice blend carves its niche through a singular smoky and modestly bitter narrative unlike any other.

Piri Piri – A Peppery Punch from Mozambique

In the Luso-African tapestry that is Mozambique’s gastronomy, the tongue-tingling ferocity of Piri Piri reigns paramount. Cultivated from the African bird’s-eye chili, it orchestrates an incendiary ballet on the senses, typically bottled as a scintillating sauce fit to accompany seafood, poultry, or just saturate any meal daring enough for a dance with fiery abandon.

Wild Pepper (Mbongo Tchobi) – Earthy and Spicy

Emerging amidst oral verses on Cameroonian haunting rhythms, the Wild Pepper or Mbongo Tchobi, packs an earthy, pungent bite. Hallowed in the hearty signature local dishes, these peppercorns flaunt a canvas of flavor where fleeting spice meets the untamed spirit of Central Africa’s culinary essence, smuggling a shiver of surprise into each savory revelation it graces.

Southern African Must-Have Spices

Chakalaka Spice – The Taste of South Africa

South Africa’s ‘Rainbow Nation’ palette basks particularly in joyous celebration when spritzed with its beloved Chakalaka Spice. This vivacious blend riffs peppies, sweet paprika, curry leaves, and fenugreek across its span, imparting the color and pizazz needed to honor the eponymous spicy vegetable relish, a dish born during the country’s gold rush and evolving into a communion staple at any modern local feast.

Peri-Peri – The Iconic South African Chili

This petite intuition of notorious heat, Peri-Peri derives its vernacular sizzle from the Swahili ‘pepper pepper’, an array reflective of its ought flame. A relative to Piri Piri, the chilies undergo a metamorphosis into sauces and seasonings that tanche the country’s Portuguese-seared influence, especially noted dousing ardor over iconic Peri-Peri chicken that typifies South African zest.

Madagascar Vanilla – The World’s Favorite

The gloried term, ‘Madagascar Vanilla’ instantly connotes creamy, mellow essences expected in palate-pleasing treasures worldwide. Tilling as the bean descended from rich volcanic soils, the Bourbon vanilla’s applause summarizes with waves wafting from ice creams, pastries, and myriad confections it synonymizes, thus ensnaring Madagascar into sentinel museau of any culinary sweet whisperer.

Conclusion

Our thrilling odyssey across Africa’s panoply of spices concludes, but the adventure within your pantry is just beckoning. The kaleidoscopic range of flavors captured in this essential list of African spices and herbs is fundamental to the soul of the continents’ kitchens, carrying the whispers of tradition and the tales of shared heritage to plates across the globe. As you stir these spices into your next dish, let each pinch be a step towards the diverse tapestry of African culture and its gastronomic dialect. We implore eager culinary minds to diverge from the vade mecum and play their taste symphonies with the vibrant hues of Africa—where a world of extraordinary zest awaits to transform the everyday meal into an extraordinary feast for the senses.

Frequently Asked Questions

What are the most commonly used spices in African cooking?

While variation exists among different regions, common spices include Berbere in Ethiopia, Ras el Hanout in North Africa, Suya in West Africa, Piri Piri in Southern Africa, and the ubiquitous use of ingredients like cinnamon, coriander, and nutmeg across the continent.

How can African spices be incorporated into everyday cooking?

Incorporate African spices into marinades, spice rubs for meats, and seasoning for stews and soups. Many spices also work wonderfully in vegetarian dishes – liberally apply them to roasted vegetables or grain dishes for a bold twist.

Where can I find authentic African spices?

Authentic African spices can be found at specialty grocery stores, international markets, or online spice retailers focusing on African ingredients. Ensure that you look for those who reputedly source their spices to get the most authentic and fresh flavor profiles.

Chicken Yassa: A traditional recipe from Senegal

A Poultry Delight with a Senegalese Twist

Chicken Yassa, hailing from Senegal, is a tangy and flavorful dish. Marinated in an aromatic mix of lemon and onions, this chicken preparation exemplifies the perfect blend of zest and savory flavors.

Journey into the Heart of Senegalese Cuisine

With its origins in the Casamance region of Senegal, Chicken Yassa is more than just a dish—it’s a celebration of Senegalese culinary innovation, blending simple ingredients to create a symphony of flavors.

Essentials for the Perfect Chicken Yassa

  • 4 chicken pieces (legs or thighs)
  • 4 onions, thinly sliced
  • Juice of 2 lemons
  • 3 cloves garlic, minced
  • 1 chili pepper, deseeded and chopped (adjust to taste)
  • 2 tablespoons vegetable oil
  • Salt and pepper to taste
  • 1 cup chicken broth

Crafting the Yassa Magic

  1. Marinating the Chicken: In a large bowl, mix onions, lemon juice, garlic, chili pepper, salt, and pepper. Add chicken pieces, ensuring they’re well-coated with the marinade. Let it sit for several hours, preferably overnight in the refrigerator.
  2. Searing the Poultry: In a pan, heat the vegetable oil. Remove chicken from the marinade (keep the marinade) and sear each piece until golden brown on all sides.
  3. Creating the Sauce: In the same pan, add the saved marinade and chicken broth. Let it simmer until onions are soft and translucent.
  4. Uniting Chicken and Sauce: Return the seared chicken to the pan, immersing it in the sauce. Cover and simmer for about 30 minutes until chicken is tender.
  5. Serving Tradition: Chicken Yassa is best served with rice, soaking up the flavorful sauce.

Chicken Yassa: Savoring Senegal’s Culinary Richness

Every bite of Chicken Yassa offers a rich tapestry of Senegalese culture, history, and culinary prowess. It serves as a delightful introduction to a nation’s heart through its cuisine, where ingredients, techniques, and love come together to create gastronomic masterpieces. As you embark on your culinary travels through Africa, let Chicken Yassa be a flavor-packed pit stop.

This dish is a testament to the diverse Senegal Food Culture. Explore this and other culinary wonders with us.

Nems: Africa’s Flavorful Spring Roll Spin

Diving into the Crispy Layers of African Culinary Art

Nems, often associated with Vietnamese spring rolls, have found a special place in the culinary heart of many West African countries, especially Senegal. These crispy, delicate rolls, bursting with flavor, are a testament to the cross-cultural exchanges that have enriched global cuisines.

Nems: A Tale of Migration and Fusion

While the origins of Nems trace back to Southeast Asia, their introduction to Africa, particularly in West African nations, came with the flow of migrants and traders. Over time, these spring rolls have been infused with African flavors and ingredients, resulting in a delightful fusion that’s both familiar and new.

Ingredients for the Perfect Nems

For the Wrapper:

  • Rice paper or spring roll wrappers

For the Filling:

  • 200 grams of minced meat (chicken, beef, or pork)
  • 100 grams of shrimp, chopped (optional)
  • 50 grams of glass noodles, soaked and chopped
  • 1 carrot, julienned
  • 1/2 cabbage, thinly sliced
  • 2 cloves garlic, minced
  • 1 small onion, finely chopped
  • 1 tablespoon fish sauce or soy sauce
  • Salt and pepper to taste
  • Vegetable oil for frying

Directions for the perfect Nems:

  1. Filling Preparation: In a large pan, sauté the onions and garlic until translucent. Add the minced meat and cook thoroughly. If using shrimp, add it next and cook until pink. Incorporate the julienned carrot and sliced cabbage. Stir in the glass noodles, fish sauce or soy sauce, and season with salt and pepper. Mix well and let cool.
  2. Wrapping the Nems: Soak the rice paper in warm water until it becomes soft and pliable. Lay it flat on a clean surface. Place a portion of the filling near the bottom end of the wrapper. Fold the bottom over the filling, then fold the sides inward and roll it up tightly.
  3. Frying to Golden Perfection: In a deep frying pan, heat the vegetable oil. Once hot, gently place the Nems into the oil, frying them until they turn golden brown and crispy. Remove and drain on paper towels.

Savoring the Nems Experience

Nems, with their crispy exterior and flavor-packed interior, are a culinary journey in every bite. They’re a testament to how traditional recipes can evolve, adapt, and flourish in new environments. Whether paired with a spicy dipping sauce or enjoyed on their own, Nems embody the spirit of culinary fusion. As you explore the diverse gastronomy of Africa, let Nems be a crispy, tasty reminder of the continent’s ability to embrace and transform global dishes.

Craving more flavors from West Africa? Find more Authentic Senegalese Recipes on our dedicated page.

Authentic Basbousa: Egyptian Semolina Cake Delight

Introduction to the Authentic Basbousa

Get ready to tantalize your taste buds with the sweetness of the Middle East! Basbousa, a traditional Egyptian semolina cake, is a decadent dessert known for its unique texture and rich, syrupy goodness. This timeless treat, perfect for special occasions or any time you crave a sweet indulgence, is beloved by many and sure to be a hit at your next gathering. In this article, we’ll guide you through crafting an authentic Basbousa that will transport your senses straight to the vibrant streets of Cairo.

History and Origins

The story of Basbousa is as rich as its flavor. With roots stretching across the Mediterranean and the Middle East, this dessert goes by many names—Hareeseh, Revani, and Namoura. Originating from Egypt, Basbousa is a legacy passed through generations. Each family adds a personal touch, whether it’s incorporating rose water or a sprinkle of coconut. This recipe, like the ancient pyramids, has stood the test of time, becoming an emblem of Egyptian hospitality and celebration. So, let’s embark on a culinary expedition to the heart of this historical delight.

The Basbousa Recipe

Ingredients for the Basbousa

  • Semolina – 2 cups
  • Sugar – ¾ cup, and 1 cup for the syrup
  • Unsalted Butter – ½ cup, melted
  • Yogurt – 1 cup (plain)
  • Baking Powder – 1 teaspoon
  • Blanched Almonds – for garnish
  • Rose Water – 1 tablespoon, 2 tablespoons for the syrup
  • Water – ¾ cup, for the syrup
  • Lemon Juice – 1 tablespoon, for the syrup

Directions to make the Basbousa

  1. Preheat the oven to 180°C (350°F) and lightly grease a square baking dish with butter.
  2. In a large bowl, combine the semolina, ¾ cup sugar, and baking powder.
  3. Mix in the melted butter until the mixture resembles coarse crumbs. Then, stir in the yogurt until well combined.
  4. Spread the batter evenly in the prepared baking dish.
  5. Using a knife, score the batter into squares or diamonds and place an almond on top of each piece.
  6. Bake in the preheated oven for about 40 minutes, or until the top turns a light golden color.
  7. While the Basbousa bakes, prepare the syrup. Combine 1 cup of sugar with the water in a small saucepan. Bring to a boil, and then lower the heat. Add the lemon juice and 2 tablespoons of rose water, simmering for about 10 minutes until slightly thickened.
  8. Once the Basbousa is ready, remove from the oven and pour the warm syrup over the hot cake. Let it soak in for at least an hour.
  9. Cut through the pre-scored lines, serve, and enjoy the authentically sweet flavors of Egypt!

Chef’s Tips for the Basbousa

Here are some insider tips to ensure your Basbousa turns out perfectly every time.

Tip #1: The secret to an excellent Basbousa is in the syrup. Ensure that the syrup is warm when pouring over the hot cake, as this helps it absorb better, enhancing the flavor and texture.

Tip #2: Don’t rush the soaking process! Patience is key. Allow the cake to fully absorb the syrup for that signature sticky, sweet profile.

Tip #3: For extra flavor, consider sprinkling some toasted almonds or coconut flakes on top of the Basbousa before serving.

Tip #4: Balance is crucial in Basbousa. While we love the sweetness, be careful not to over-saturate the cake with syrup to avoid it becoming too dense or soggy.

Source Local Ingredients and Adapt the Recipe According to the Seasons

Using local and seasonal ingredients can take your Basbousa from great to extraordinary. Here’s how:

Paragraph 1: Opt for high-quality, fine semolina found at your local Middle Eastern store; it’s the backbone of your Basbousa. Seasonal fruits like oranges can be incorporated into the syrup during winter for a citrusy twist.

Paragraph 2: When it’s coconut season, fresh shredded coconut can replace or complement the semolina, giving a fresh flavor profile and texture to the cake.

Paragraph 3: Lastly, always choose local, organic dairy products like butter and yogurt for a fresher taste and richer cake.

5 Frequently Asked Questions

Can I use oil instead of butter in Basbousa?

While butter provides a rich flavor, some use vegetable or coconut oil as a substitute for a lighter version or dietary preferences.

Is Basbousa gluten-free?

Traditionally, Basbousa is made with semolina, which contains gluten. However, gluten-free alternatives can be used, such as almond flour or gluten-free baking mix.

Can I make Basbousa without yogurt?

Yes, other dairy products like sour cream or even milk can be used, though they may slightly alter the taste and texture.

How long can I store Basbousa?

When stored properly in an airtight container, Basbousa can last up to a week at room temperature or can be refrigerated to extend its shelf life.

Can Basbousa be made vegan?

Yes, by substituting dairy butter with vegan butter, yogurt with plant-based yogurt, and using sugar that hasn’t been refined using bone char.

Journey to the heart of Egypt’s culinary traditions and discover the flavors that have shaped its culture for centuries. From hearty stews to fragrant desserts, every bite tells a story. Immerse yourself in the world of Egyptian food and experience the unique fusion of Middle Eastern and Mediterranean influences. Start your adventure on our Egyptian Food main page and get ready to taste the flavors of Egypt.

Authentic Egyptian Baklava Recipe – A Sweet Traditional Delight

Introduction to the recipe

Welcome to the delectable world of Egyptian Baklava, a sweet pastry loved by many across the globe. If you’re looking to create an authentic Middle Eastern dessert, famed for its rich flavors and flaky texture, then this traditional Egyptian Baklava recipe is perfect for you. Follow along to add a wow factor to your dessert spread that your family and friends will adore.

History and Origins

Tracing its history back to the Ottoman Empire, Baklava is a dessert that has been cherished for centuries. Though often associated with Greek cuisine, the Egyptian take on Baklava includes unique spices and nuts, setting it apart in the rich tapestry of Mediterranean sweets. Discover the engaging tale of how this pastry journeyed through time and space to become a celebrated staple in Egyptian festivities and everyday life. Embark with us on this culinary adventure and find out why Baklava has remained irresistible through the ages.

The Egyptian Baklava Recipe

Ingredients for the Egyptian Baklava

  • 1 pound of phyllo dough, thawed
  • 2 cups of mixed nuts (such as pistachios, walnuts, and almonds), finely chopped
  • 1 cup of unsalted butter, melted
  • 1 teaspoon of ground cinnamon
  • 1/2 teaspoon of ground cardamom
  • 1/4 teaspoon of ground nutmeg
  • For the syrup:
  • 2 cups of granulated sugar
  • 1 cup of water
  • 1/2 cup of honey
  • 2 tablespoons of lemon juice
  • 1 cinnamon stick
  • 1 teaspoon of orange blossom water (optional)

Directions to make the Egyptian Baklava

  1. Begin by preheating your oven to 350°F (175°C). Grease a 9×13-inch baking dish with some of the melted butter.
  2. In a bowl, combine the finely chopped nuts with ground cinnamon, cardamom, and nutmeg. Mix them well.
  3. Lay out your phyllo dough and cover it with a damp towel to prevent it from drying out.
  4. Place a sheet of phyllo in the prepared baking dish and brush generously with melted butter. Repeat this process to layer and butter 8 sheets of phyllo.
  5. Evenly spread a layer of the nut mixture over the top phyllo layer. Add another layer of two buttered phyllo sheets, then another layer of nuts. Continue layering phyllo and nuts, finishing with a top layer of about 6 to 8 buttered phyllo sheets.
  6. Using a sharp knife, cut the baklava into diamond or square shapes, ensuring to cut through all the layers.
  7. Bake in the preheated oven for about 50 minutes, or until the pastry is golden and crisp.
  8. While the baklava is baking, prepare the syrup. In a saucepan, combine sugar, water, lemon juice, and the cinnamon stick. Bring to a boil, then reduce heat and simmer for about 10 minutes. Remove from heat, add honey and orange blossom water, and stir well.
  9. Once the baklava is done, remove it from the oven and immediately pour the syrup over the hot pastry.
  10. Allow the baklava to cool completely at room temperature for several hours or overnight; this helps the syrup to absorb and set properly.
  11. When ready to serve, re-cut along your previous lines and enjoy this traditional Egyptian Baklava!

Chef’s tips for the Egyptian Baklava

Tip 1: Consistency is key when handling phyllo dough. Work swiftly but carefully when layering, as it dries out quickly. Keeping a damp towel on hand to cover unused sheets is a great way to keep them from becoming brittle.

Tip 2: For a richer flavor and additional crunch, toast the nuts in a dry pan over medium heat before chopping. Make sure to watch them closely as they can burn quickly. Let them cool before using them in your mixture.

Tip 3: When pouring the syrup over the hot baked Baklava, be sure to do it evenly, so each piece is properly soaked. This step is crucial for getting the perfect texture and taste.

Tip 4: Patience pays off with Baklava. Letting it sit and soak up the syrup not only enhances the flavor but also improves the texture. If you can wait, let it set overnight for the best results.

Source local ingredients and adapt the recipe according to the seasons

Locally sourcing ingredients is not just a way to support your regional economy, but also a method to ensure that your Baklava has the freshest flavors possible. By adapting to the seasons, you can incorporate a variety of regional nuts which can offer a twist to the traditional recipe.

During spring and summer months, local farmers’ markets often provide the best options for fresh nuts and honey – the staples of any Baklava recipe. If you live in a region where certain nuts aren’t available, don’t hesitate to get creative and substitute with what’s seasonal and accessible.

The key with Baklava is to embrace the essence of the dessert with its sweet, nutty layers, regardless of the specific ingredients. Always remember to adjust the quantity of spices like cinnamon and cardamom to suit the nuts that you are using.

5 Frequently Asked Questions

What’s the best way to cut Baklava?

For the perfect diamond-shaped Baklava pieces, start by cutting straight lines down the length of the pan about 1.5 inches apart. Then, make diagonal cuts at the same width, creating the traditional diamond pattern. It’s essential to cut before baking as the pastry becomes very delicate once cooked.

Is it necessary to use a mix of nuts in this recipe?

While a mix of nuts adds depth to the flavor profile of Baklava, it’s not a requirement. You can use a single type of nut, such as pistachios or walnuts. However, ensure they’re finely chopped to create the desired texture.

Can I freeze Baklava?

Baklava freezes quite well and can be enjoyed at a later date. To freeze, make sure the syrup has been absorbed and the pastry has cooled completely. Then, layer the pieces between wax paper in an airtight container. Baklava can be stored in the freezer for up to 3 months.

Should Baklava be served warm or cold?

Baklava can be enjoyed at room temperature or slightly warmed. Heating it slightly can enhance the flavors and make the texture even more delightful. However, avoid overheating as it can cause the syrup to soften the layers too much.

My Baklava is too dry/hard, what did I do wrong?

There are a few reasons Baklava could turn out too dry or hard. It’s possible that not enough syrup was used, or the phyllo layers weren’t adequately buttered. It’s also important to make sure the Baklava doesn’t overbake. Always keep an eye on your dessert as ovens can vary, and use a sufficient amount of syrup to ensure each piece is well-coated.

Embark on a culinary adventure to the land of the pharaohs. Uncover the ancient flavors of Egypt with our collection of traditional Egyptian recipes. Experience the bold and vibrant spices, the aromatic herbs, and the rich flavors that have been passed down through generations. From classic dishes like koshary and ful medames to lesser-known gems like molokhia and basbousa, our main page on Egyptian Food is the gateway to discovering the true essence of this remarkable cuisine.

Molokhia: A Unique Green Soup Full of Flavor and History

Introduction to the Recipe

If you’re looking to expand your culinary horizons with a nutritious and savory dish, look no further than Molokhia. This green soup has a velvety texture and a unique taste that warms the soul! Discover how to make this Middle Eastern favorite and bring a taste of tradition to your table.

History and Origins

Molokhia has a storied past that traces back to the pharaohs of ancient Egypt. Initially reserved for royalty, this humble green leaf has traversed borders and is now a staple in kitchens across the Middle East. With a name that means ‘kingly,’ you can savor this dish knowing it’s infused with centuries of history!

The Molokhia Recipe

Ingredients for the Molokhia

  • 400 grams of fresh Molokhia leaves, finely chopped or 200 grams of dried Molokhia
  • 1 liter of chicken or vegetable stock
  • 3 cloves of garlic, minced
  • 1 medium onion, finely chopped
  • 1 teaspoon of ground coriander
  • Salt and black pepper to taste
  • 2 tablespoons of olive oil or ghee
  • 1 lemon, sliced for garnish

Directions to Make the Molokhia

  1. Start by preparing the Molokhia leaves. If using fresh leaves, wash them thoroughly and chop them finely. If using dried, gently crumble them.
  2. In a large pot, heat the olive oil or ghee over medium heat. Add onions and cook until translucent.
  3. Add the minced garlic and ground coriander to the pot and sauté until fragrant.
  4. Pour in the chicken or vegetable stock and bring to a simmer.
  5. Gradually stir in the Molokhia leaves. If using fresh Molokhia, simmer for about 10 minutes. For dried leaves, simmer for slightly longer, until the leaves have softened and the soup has thickened to a suitable consistency.
  6. Season with salt and black pepper to taste.
  7. Garnish with lemon slices and serve hot.

Chef’s Tips for the Molokhia

To elevate your Molokhia, consider these professional tips:

Tip 1: Achieve the Perfect Texture

The key to the perfect Molokhia is in its texture. Whether you opt for fresh or dried leaves, ensure they’re finely chopped to release their characteristic silkiness.

Tip 2: Balance the Flavors

Molokhia has a distinctive earthy flavor that pairs well with garlic and coriander. Don’t shy away from these aromatics—use them liberally to achieve a balanced and aromatic soup.

Tip 3: Enhance with Meat or Poultry

While delicious on its own, Molokhia can be enriched with cooked chicken or rabbit. Add precooked meat to the soup during the last few minutes of simmering for an extra layer of flavor and protein.

Tip 4: Serve with the Right Accompaniments

Molokhia is traditionally served over rice or with flatbread on the side. Choose one to soak up the soup’s flavors and to complete the dining experience.

Source Local Ingredients and Adapt the Recipe According to the Seasons

Crafting Molokhia with ingredients sourced from local markets not only supports your community but also ensures peak flavor and freshness. Fresh Molokhia leaves may be available in Middle Eastern stores or markets, especially during the summer months.

When certain ingredients are out of season, feel free to substitute with what’s available. Dried Molokhia can replace fresh leaves and seasonal vegetables can add a unique twist to your green soup.

Lastly, adapting to seasonal availability doesn’t just apply to the Molokhia plant. Use seasonal garlic for the best zest and opt for locally-produced oils for the truest taste.

5 Frequently Asked Questions

Question 1: Can Molokhia be made vegetarian?

Yes, simply use vegetable stock instead of chicken stock to make a vegetarian version of this dish.

Question 2: How long does Molokhia last in the fridge?

Properly stored in an airtight container, Molokhia can last in the fridge for up to 3-4 days.

Question 3: Is Molokhia healthy?

Yes, Molokhia is rich in vitamins and minerals, low in calories, and a good source of fiber.

Question 4: Can I freeze Molokhia soup?

Yes, Molokhia soup freezes well. Let it cool before transferring to a suitable container. It can be stored frozen for up to 3 months.

Question 5: What does Molokhia taste like?

Molokhia has a unique flavor profile: slightly bitter, earthy, with a mucilaginous texture that is similar to okra when cooked.

Indulge in the vibrant flavors of Egyptian street food. From delicious falafel wraps to savory koshary bowls, the streets of Egypt are filled with mouthwatering delights. Explore the world of Egyptian street food and learn how to recreate these beloved dishes in your own kitchen. Discover more on our Egyptian Food main page.

How to Make Koshari – The Ultimate Egyptian Street Food Delight

Introduction to the recipe

Capture the essence of Egyptian street food by making delectable Koshari at home! Known for its savory flavors and satisfying nature, Koshari combines lentils, rice, and pasta topped with a spicy tomato sauce and crispy onions. It’s a vegetarian-friendly feast that’s guaranteed to please!

History and Origins

The beloved Koshari has its roots deeply embedded in Egyptian culture, often labeled as the national dish. Its origin story is as diverse as the layers of the dish itself, with influences from Indian, Italian, and Middle Eastern cuisines. The dish emerged in the 19th century and rapidly became a staple among the working class, offering a filling meal at an affordable price.

The Koshari Recipe

Ingredients for Koshari

  • 1 cup medium-grain rice
  • 1 cup brown lentils
  • 1 cup small macaroni pasta
  • 2 cups vegetable broth or water
  • 1 large onion, thinly sliced
  • 1/4 cup olive oil
  • For the sauce:
  • 1 can of crushed tomatoes (14 oz)
  • 2 garlic cloves, minced
  • 1 teaspoon ground cumin
  • 1/4 teaspoon cayenne pepper (adjust per taste)
  • Salt to taste

Directions to make Koshari

  1. Start by rinsing the brown lentils and cooking them in 3 cups of boiling water until tender yet firm, which usually takes about 20-25 minutes. Then drain and set aside.
  2. In a separate pot, cook the rice in vegetable broth or water according to package instructions until al dente.
  3. Boil the macaroni pasta in a pot of salted water until al dente. Then, drain the pasta and set it aside.
  4. To prepare the crispy onions, heat olive oil in a skillet over medium heat and fry the thinly sliced onion until golden brown and crispy. Be sure to keep an eye on the onions to prevent burning. Once done, transfer them to a paper towel to absorb the excess oil.
  5. For the tomato sauce, combine the crushed tomatoes, minced garlic, cumin, cayenne pepper, and salt in a saucepan. Let it simmer for 10 minutes until the sauce thickens slightly.
  6. To assemble Koshari, layer the ingredients in serving bowls starting with the rice, then the lentils, followed by the macaroni.
  7. Pour a generous amount of the tomato sauce over each serving and top with the crispy onions.
  8. Chef’s tips for Koshari

    Koshari is a dish that encourages creativity and personal touch. Beyond the classic lentil and rice base, experiment with adding chickpeas for an extra burst of protein and a new layer of flavor. Chickpeas offer a pleasing, slightly nutty taste that complements the earthiness of the lentils and the neutrality of the rice and pasta. Moreover, don’t hesitate to sprinkle a pinch of your favorite spices to the tomato sauce—think coriander, paprika, or a whisper of cinnamon—to bring warmth and depth to the dish.

    Another way to immerse yourself in the art of Koshari-making is to aim for the perfect texture. The trick lies in the cooking times; the al dente finish for pasta and rice ensures a variety of textures which are at the heart of Koshari’s unique appeal. The crispy onions, too, are non-negotiable—you want them to be caramelized and golden brown, offering a crunch that sings in harmony with the soft layers beneath. Lastly, after you’ve lovingly layered your Koshari, be patient. Give it a few minutes to rest before serving. This pause allows the mingling of flavors, creating a symphony in a bowl that’s well worth the wait.

    Source local ingredients and adapt the recipe according to the seasons

    The secret to a remarkable Koshari isn’t just in the preparation; it’s also rooted in the quality of its components. Whenever possible, seek out local producers for your lentils, rice, and onions. The fresher the ingredients, the more vibrant your Koshari will taste. Local farmers’ markets not only offer a treasure trove of fresh produce, but they also give you the opportunity to support your local economy and reduce the environmental impact that comes with long-distance transportation of ingredients.

    Seasonality is another aspect of cooking that breathes new life into Koshari. As the seasons turn, so do the available pasta shapes and tomato varieties in your local markets. In the summer, you might find joy in incorporating heirloom tomatoes into your sauce, their juices brimming with sunshine and flavor, and perhaps a lighter pasta shape. In the cooler months, heartier pasta can provide additional comfort, and slow-roasted tomatoes might offer a more concentrated and robust profile to your dish. Consider these subtle seasonal changes as opportunities to reinterpret Koshari through the year, connecting your cooking to the world around you and keeping this beloved classic ever-evolving and exciting.

5 Frequently Asked Questions

What kind of lentils should I use for Koshari?

Brown lentils are typically used for Koshari, but green lentils can also be a suitable substitute.

Can I make Koshari gluten-free?

Yes, you can use gluten-free pasta and check that your vegetable broth is also certified gluten-free to make this dish conform to a gluten-free diet.

Is Koshari considered a healthy dish?

Koshari is high in protein and fiber due to the lentils and whole grains. However, it can be calorie-dense, so moderate portions are recommended if you’re watching your calorie intake.

How long can you store Koshari leftovers?

Properly stored in an airtight container, Koshari can last up to 3-4 days in the refrigerator. Reheat on the stovetop or microwave and add a bit of water if necessary to prevent drying out.

Can Koshari be frozen?

It’s best to enjoy Koshari fresh, but if needed, you can freeze the rice and lentils separately from the sauce and onions. When ready to eat, thaw and reheat, then assemble with freshly made onions and sauce for best results.

Experience the exotic flavors of Egypt with our curated collection of traditional Egyptian recipes. From aromatic spices to hearty stews, Egyptian cuisine is a true feast for the senses. Discover the secrets of Egyptian cooking and immerse yourself in the culture and history of this ancient land. Find out more on our Egyptian Food main page.